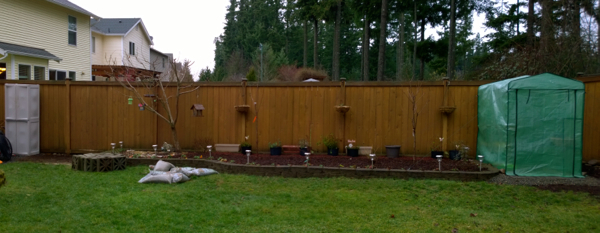
A few weeks back I finally put up my first mini greenhouse and so far have been happy with it.
The only real issue came down to space though. They are not truly that big – and the first one only has 2 rows of shelving on one side. So I started thinking about a second one, flanking the garden bed with our cherry trees. This area receives a lot of sun in winter and spring.
Also prompting me was a friend, who was moving, offered me up cloverleaf pavers for free, if I came over and hauled. Done! I had an idea.
Sitting in this spot had been a severely ugly contractor special tree (and the same had been on the other side as well). Once cut down, the ground was packed. The little shed to the left is my well used “garden shed” that has shockingly held up well since May of last year (it is a Sterilite 4-Shelf Utility Cabinet).
This time I picked up a mini greenhouse from our local hardware store, which was on sale for $80. This one has shelving on both sides, three levels high, although the top shelf is more for resting things on. It goes together easily enough – I did the frame on our deck again, and moved it over (it is very light), so that it stayed straight when putting it together. Now then…one issue was the directions: they left a whole section out. Oopsies. I figured it out eventually, but lord it was annoying! As well, once you get all the parts in, make sure you go around a few times and squeeze everything together. The parts can and will shift a bit.
Since these greenhouses are feather light, you need to think about holding it down. This time I used the cloverleaf pavers to make a frame of sorts (always use yard fabric under!).
Then I filled in the floor once again with 3/8″ pea gravel (small river rock). I also filled in the blocks with the gravel as I like the look. I like the rock to be deep enough you cannot see the bars of the frame. This adds weight as well. Cover on and yep, kids in there already!
The two mini greenhouses flanking the bed. The nice part is you cannot see them from the back side of the fence as people walk by on the trail behind us. I like that!
I decided this one could have many of the seed starts in it. Also, notice the zip ties. As I mentioned in the first greenhouse post, do not skip this step! Zip tie the shelving down tight to the frame. Otherwise they are simply resting on it, and they can fall off. Which will dump your plants!
I’ve been working on seeds that will need time to germinate and sprout. This is a first for me – we shall see how it goes!
Last Monday was an amazing day though. It was a mini heat wave that had lasted for a few days and was at least mid 60’s by noon. It felt like summer and I didn’t want to go in!
We even had a picnic outside….
And Kirk found a solution for the corner garden for me. I had been looking for affordable large pots. He found these 20″ pots at The Home Depot, for $15 each. Nestled into the rocks, they will hold more cane berries this year. They hold about 2 cubic feet of potting soil each. I have enough room to put in 2-3 more as well in this very sunny corner. That until now wasn’t useable. And you might ask, why keep the rocks? Well, an endangered native lizard enjoys them! And who am I to deny them a good life….especially when I saw one sunning itself on Monday last week.


That’s a great idea to fill your greenhouse with river rock. I think it would make it feel more outdoorsy. Looking back, are you glad you chose 3/8″ pebbles? It seems like it would be a good size for this sort of thing.